Today was another stunning day here in north county San Diego. I got out for a 15 mile bike ride which took me from my home to Sycamore Canyon/ Goodan Ranch and back. This was number four of my attempt to do at least 52 meaningful hiking or biking outings in 2025. You can check out the whole adventure here.
Normally when I go biking I take my GoPro along and capture footage along the way. I do this for two reasons – 1. when doing any biking on roadways, I run the camera for safety issues (lots of bad drivers out there!), and 2. when I get to the trails I want to capture anything interesting I see along the way. Mostly I’m hoping to capture wildlife. We have all sorts here. Coyotes, bobcats, deer, mountain lions etc. It’s so cool to see them, and I love to share the clips when I do manage to get some good ones.
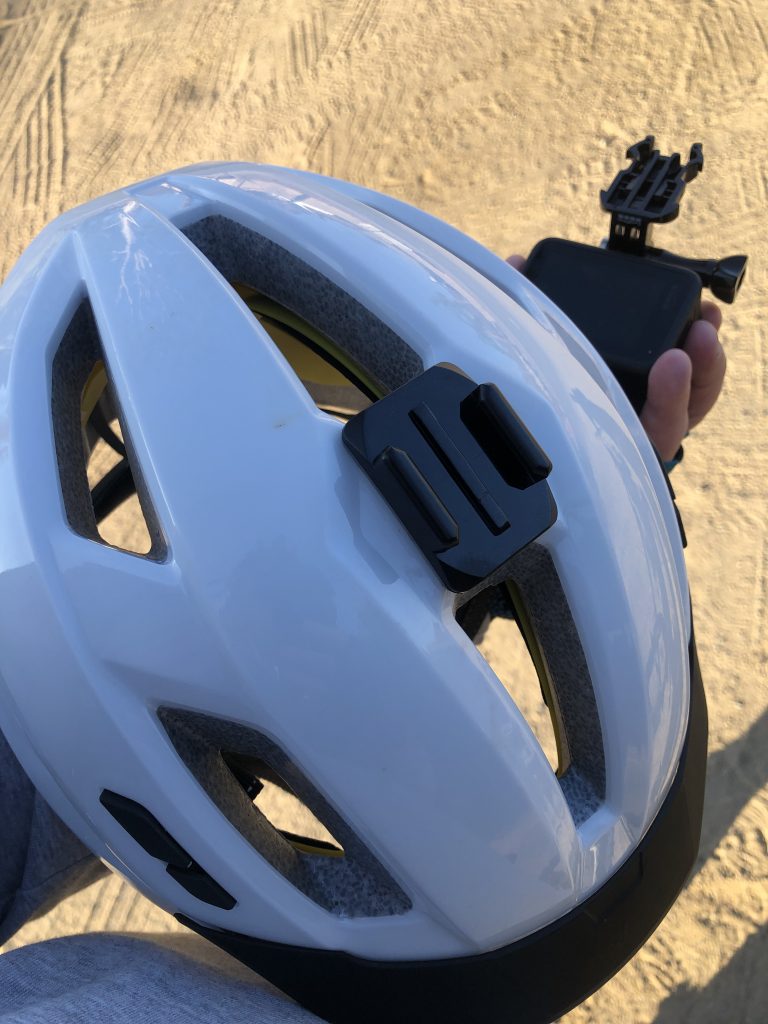
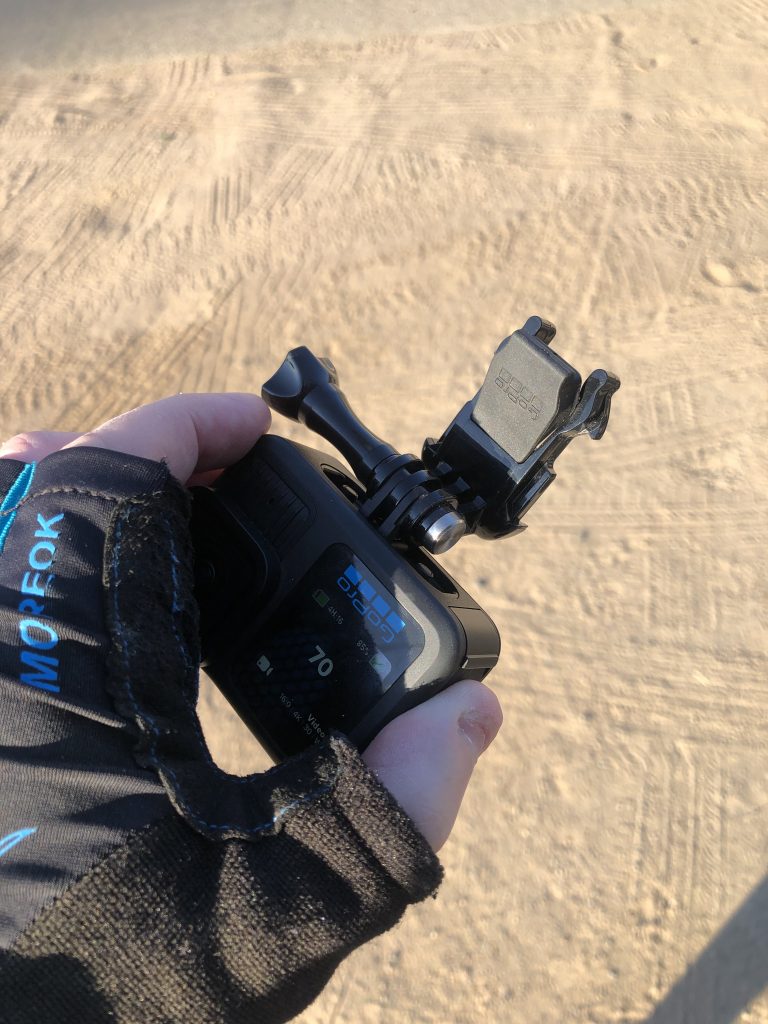
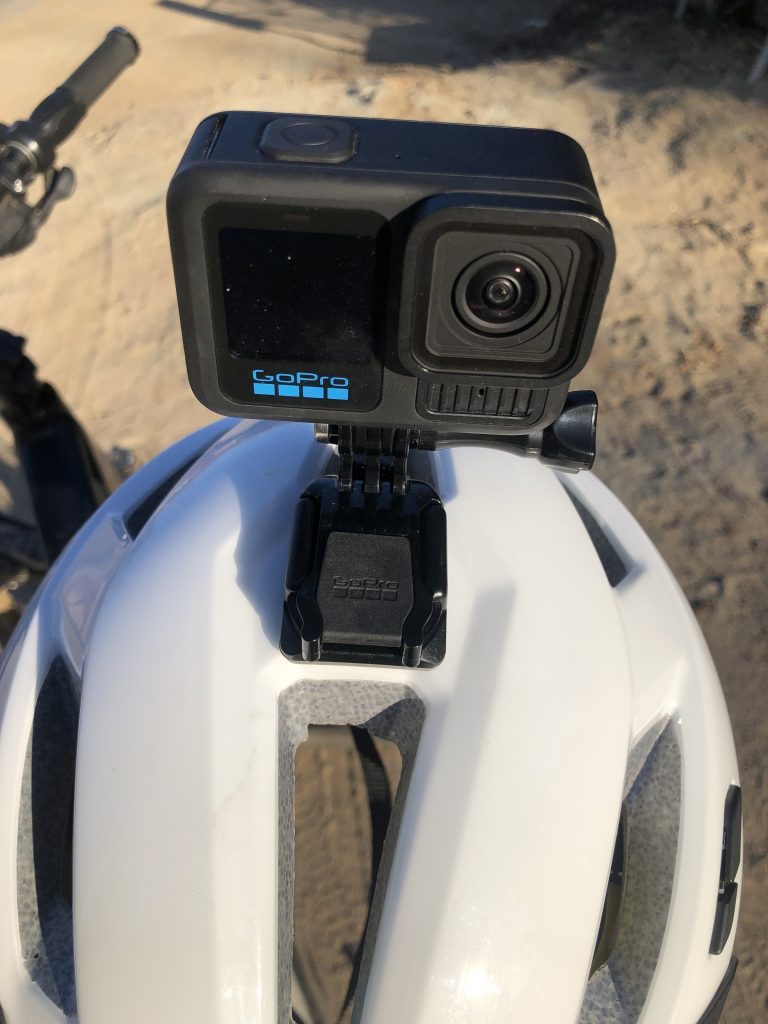
Normally I mount my GoPro on the ‘Chesty’ chest mount. Today, I opted for the helmet mount to take some video from a slightly different perspective and really just to test this thing out. I’ve only used it a couple of times so far. It came as an accessory when I bought the GoPro, so I don’t have that same sense of need to use it as like with a separate purchase i.e. the Chesty. I’ll tell you more later about which i prefer. If you want to pick one up you can get a six pack for ~$10 on Amazon here.
What does the helmet mount look like you might ask. Here’s a couple of pictures of it. It’s quite simple to detach the camera from the mount and transfer it to the Chesty, and vice versa.
Tips to get the best helmet mount GoPro footage
- Take some test footage. Once you mount the GoPro onto the helmet, you’re going to want to make sure it’s recording at a good angle. Take some test video and watch it back either on the phone app or on the GoPro itself to make sure you have it set correctly. It’ll take some adjusting to get it just as you want it.
- Make sure your helmet is snug. If your helmet is not snug to your head, there is going to be extra movement in the video, that either the camera software will adjust for or your viewer may notice in your cuts. Tighten up that helmet to reduce unnecessary movement.
- Follow directions to ensure mount is secure. There are directions to follow when securing the mounting bracket to your helmet. Make sure you follow them or you risk the camera falling off and hitting the ground. It takes many hours for the bond to set. I ran a zip tie through the helmet to ensure it bonded properly.
- Get to know your camera. There has been a couple of times where I thought the GoPro was recording but in fact it wasn’t. What a bummer! Some awesome footage was lost. I suggest that you either visually ensure the camera is recording or get to know the beep sounds it makes so that you can be sure it is actually recording.
- Don’t move too much. While riding, especially during scenes that you know you want footage from, I suggest that you try not to move your head too much. We naturally do this as we explore what’s around us, but your viewers will appreciate it if you can maintain focus on a subject or horizon and not move your head too much.
So Chesty or helmet mount?
Personally I prefer the Chesty for a few reasons. One, it’s less noticeable on your body than the helmet mount. You will definitely notice a weight change to your helmet, at least for a while until you get used to it being up there. Second, I think I genuinely prefer the camera angle of the chesty, even though it will most likely have the bike handlebars in it for the entire time. This can look a little ugly, but it helps give the viewer perspective.
Do you have other tips to offer? Id love to hear them if you’d like to get in touch.